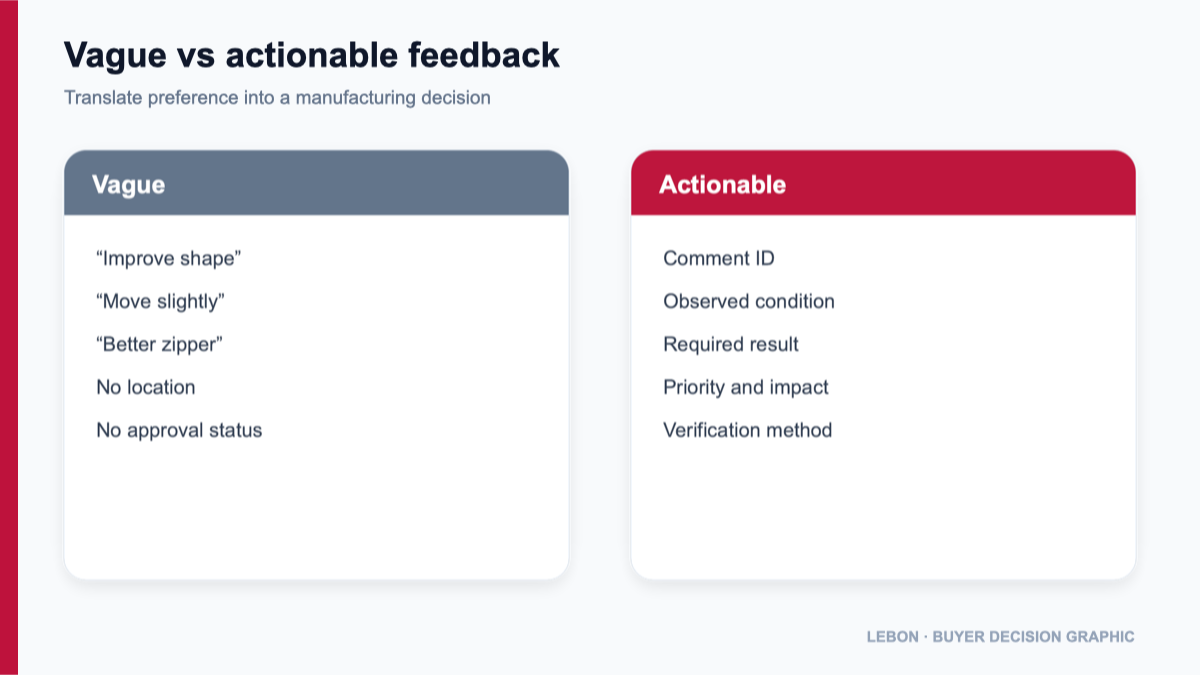
Useful bag sample feedback identifies the exact location, shows the observed condition, states the required result and records how the correction will be verified. “Improve the shape,” “make the zipper smoother” or “move the pocket slightly” leaves the sample room to choose the cause and the solution.
Number every issue. معناe an overall photograph plus a close-up, connect the comment to a measurement point or component ID, and separate defects from design changes and open questions. Assign priority and approval status. After the factory responds, update the tech pack rather than allowing the feedback sheet to become a parallel specification.
Table of Contents
Inspect the sample before writing corrections
Review the sample in a consistent condition:
- confirm product code, color and sample stage;
- identify the tech-pack and BOM revisions used;
- record every declared substitution or exception;
- allow for reasonable recovery from packing or folding;
- set zippers, straps and closures consistently;
- check the intended contents and use sequence;
- measure with the specified method;
- compare materials and components with approved references.
Without this first step, a buyer can criticize an attribute the sample was never intended to represent. A prototype made with a declared substitute should not be rejected for failing to match an unrepresented final color. It may still be rejected if the substitution makes the construction or functional result impossible to judge.
Give every issue one stable comment ID
Use a simple sequence such as C01, C02 and C03. Put the same ID on the photograph, comment log, revised drawing and factory response. Keep one decision per ID.
A comment that combines three actions creates uncertain closure. The factory may fix two and mark the whole line complete. Separate comments also make it easier to identify which change affects cost, pattern, material, tooling or another page.
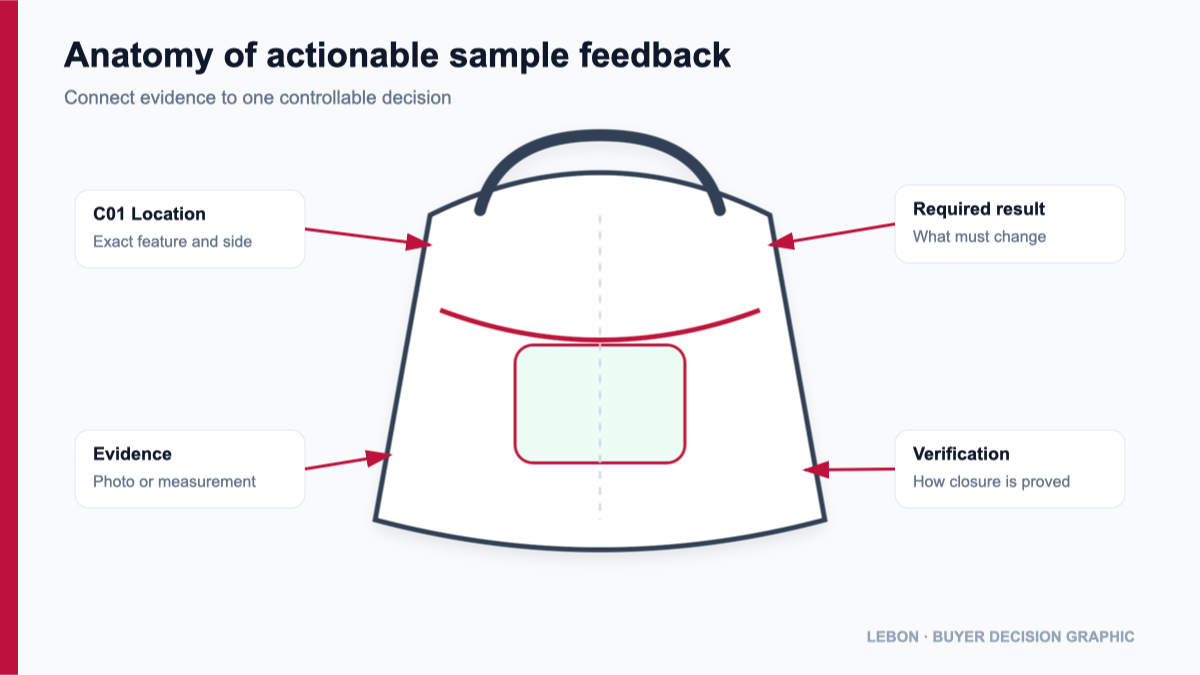
Write the observed condition before the requested action
Describe what you can verify:
- “Front pocket opening measures differently from POM P07 using the released method.”
- “Left strap attachment is visibly lower than the right when measured from the top binding seam.”
- “Lining enters the zipper path at the right-hand corner during operation.”
- “Logo center does not align with the centerline shown on artwork page A03.”
Then state the required result. Avoid diagnosing the manufacturing cause unless it has been confirmed. If you write “reduce sewing tension” but the resistance comes from seam bulk or lining clearance, the sample room may follow your instruction and leave the real problem unchanged.
Ask the factory to investigate and propose the construction correction when the cause is uncertain.
Replace subjective words with decision criteria
Subjective language can express intent, but it needs a controllable explanation.
Instead of “make it more premium,” identify the relevant attribute: cleaner standing shape, less visible seam bulk, a different hardware finish, more consistent topstitching or a changed edge treatment.
Instead of “make the pocket easier to use,” define the user action and the problem: opening too narrow for the intended item, zipper path obstructed, hand access restricted by the opening position or contents difficult to retain.
Instead of “move it slightly,” state the current and required landmark or measurement.
Use photographs that answer a manufacturing question
For each visual issue, provide:
- one overall view showing orientation and location;
- one close-up showing the condition;
- an arrow, circle or highlighted area;
- comment ID and relevant point or component ID;
- a scale or reference when size is disputed;
- the same closure and filling state used in the measurement method.
Photographs are weak evidence for precise color unless lighting, camera and reference conditions are controlled. معناe approved swatches, lab approvals or physical component references for color decisions where appropriate. A photo can show where the mismatch appears, but not always prove the magnitude of the color difference.
Separate defect, design change and open question
These require different supplier responses:
- Nonconformity: the sample does not meet the released requirement. Correct and verify against the existing specification.
- Buyer design change: the sample may meet the file, but the buyer wants a different result. Review impact, update documents and verify the revision.
- Open requirement: the tech pack did not define the attribute. The team must choose and record the requirement before judging conformity.
- Factory proposal: the supplier suggests a different construction, material or component. The buyer must approve or reject it before use.
Calling every issue a defect hides specification gaps and can create unproductive arguments. Calling every issue a design change can hide poor execution. The released requirement and sample record determine the category.
Add priority without confusing it with approval
Priority tells the team what must be resolved first. Status tells the team whether the decision is approved.
A practical priority system can distinguish:
- critical to safety, regulatory requirement or essential function;
- must fix before the next approval stage;
- should improve if the proposed solution is acceptable;
- observation or future option.
Do not use priority labels as statistical defect classifications unless the project has defined those criteria. The purpose during development is to sequence decisions and prevent a low-impact appearance preference from delaying a functional correction.
Ask the factory to respond to every comment
The supplier response should state:
- whether the issue is understood;
- likely or confirmed cause;
- proposed correction;
- affected documents or BOM items;
- cost, sourcing, tooling or schedule impact where relevant;
- verification method;
- whether a full sample, partial mock-up, component approval or updated document is proposed;
- responsible person and status.
“Noted” is not a manufacturing response. It confirms receipt, not understanding or implementation.
Review dependencies before approving a correction
One requested change can affect other features. Moving a pocket may conflict with reinforcement or an internal divider. Increasing foam can reduce device clearance and add seam bulk. Changing webbing width may require new adjusters and attachment geometry. Moving a logo can affect pocket sewing access or reinforcement.
Ask the factory to identify these dependencies. The buyer should decide the trade-off before the next sample, not discover it after the correction has been built.
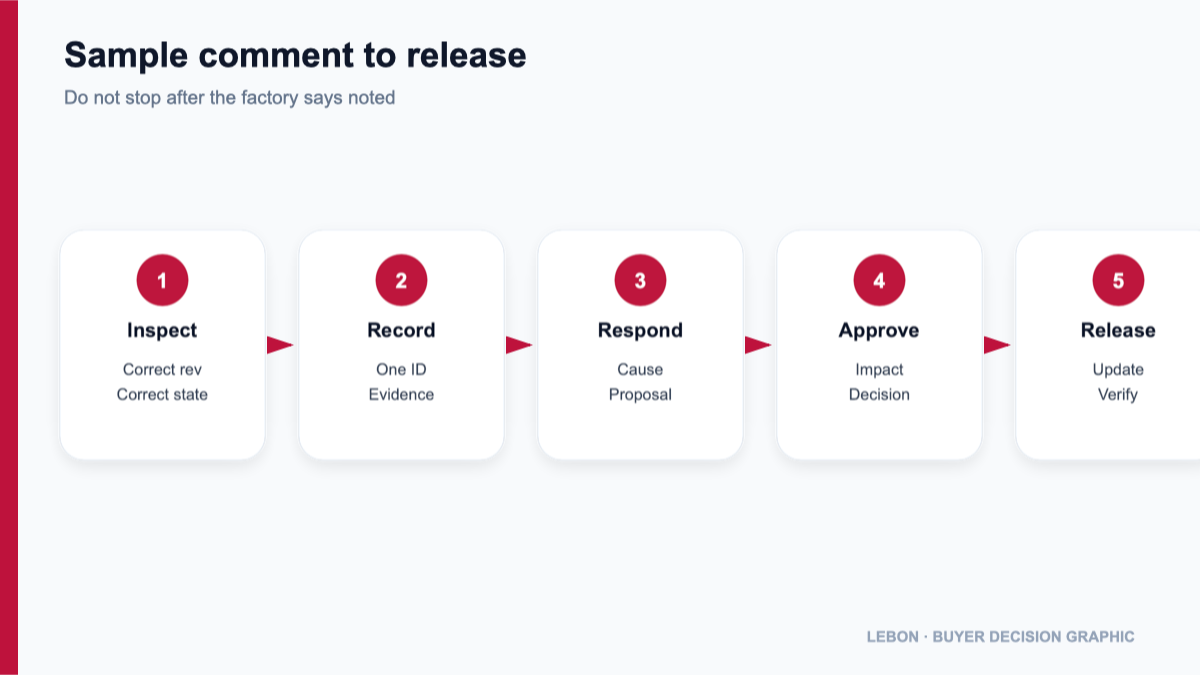
Use one feedback-to-release workflow
The process should be visible:
- Inspect against the correct revision and sample purpose.
- Record one issue per comment ID.
- Attach evidence and required result.
- Classify issue type and priority.
- Receive the factory’s cause, proposal and impact response.
- Approve, reject or revise the action.
- Update every affected tech-pack page.
- Verify the result on identified evidence.
- Close the comment or carry it forward explicitly.
Do not let sample feedback become a parallel tech pack
After several rounds, the comment file may contain the only current instructions. This forces the factory to combine an old drawing with a newer PDF and later chat messages.
Approved changes must return to the drawing, measurement sheet, BOM, artwork or packaging page they affect. The article on controlling tech-pack revisions during bag sampling explains how to identify the new release and withdraw superseded files.
Use finished-bag measurement methods for dimensional comments. For stage-specific approval, see prototype versus pre-production sample.
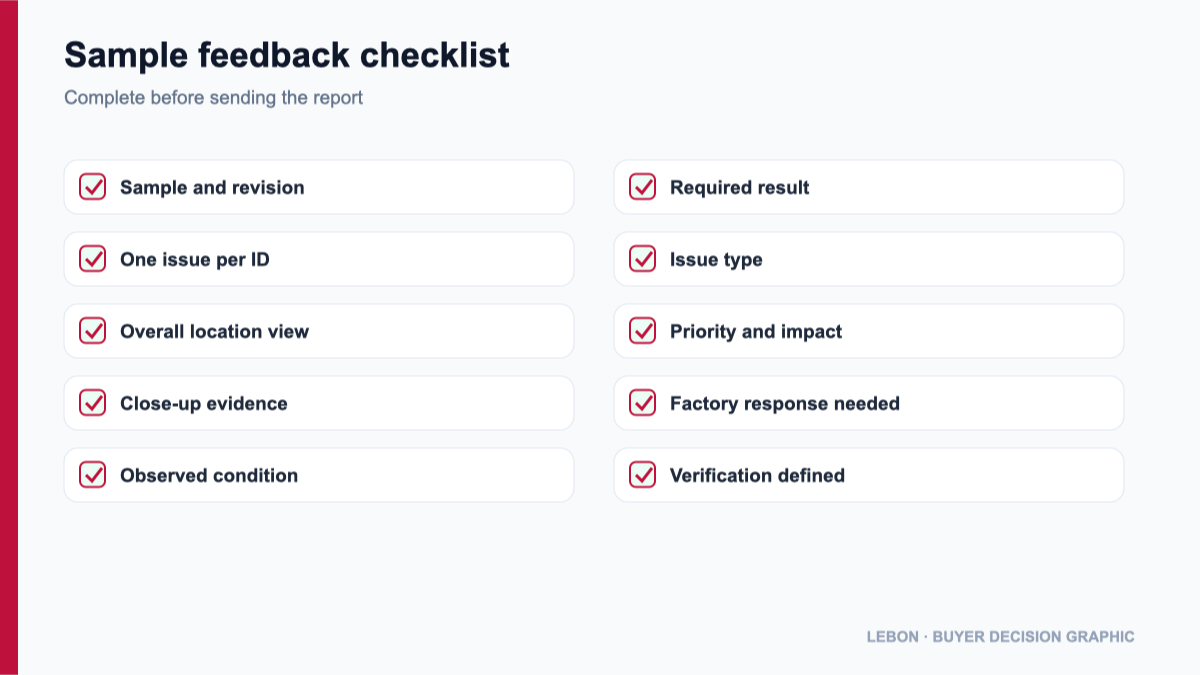
Feedback release checklist
Before sending the report, confirm:
- product, color, sample and document revisions are identified;
- every comment has one ID and one primary decision;
- location is visible on an overall view;
- evidence is shown in a close-up or measurement;
- observed condition and required result are separated;
- issue type and priority are stated;
- dependencies and impact questions are included;
- open items are not presented as approvals;
- the factory must respond to every comment;
- verification evidence is defined;
- approved changes will update the tech pack;
- bulk authorization remains separate.
What buyers should send
Send the physical sample identification, current tech pack, BOM and artwork versions, annotated photographs, measurement results, required changes, open questions and desired decision date. If a reference image is involved, state which attributes should be copied and which are only visual context. The guide on why a bag sample may not match a reference image provides a cause-based diagnostic sequence.
The broader bag sampling and quality-control process shows where this feedback belongs before pre-production release.
التالي action
If your current feedback contains phrases such as “make better,” “same as photo” or “adjust slightly,” rewrite each comment into location, evidence, required result and verification. Send the sample report and current tech pack through the product inquiry form if the manufacturing questions need to be identified before another prototype is ordered.
Technical references: