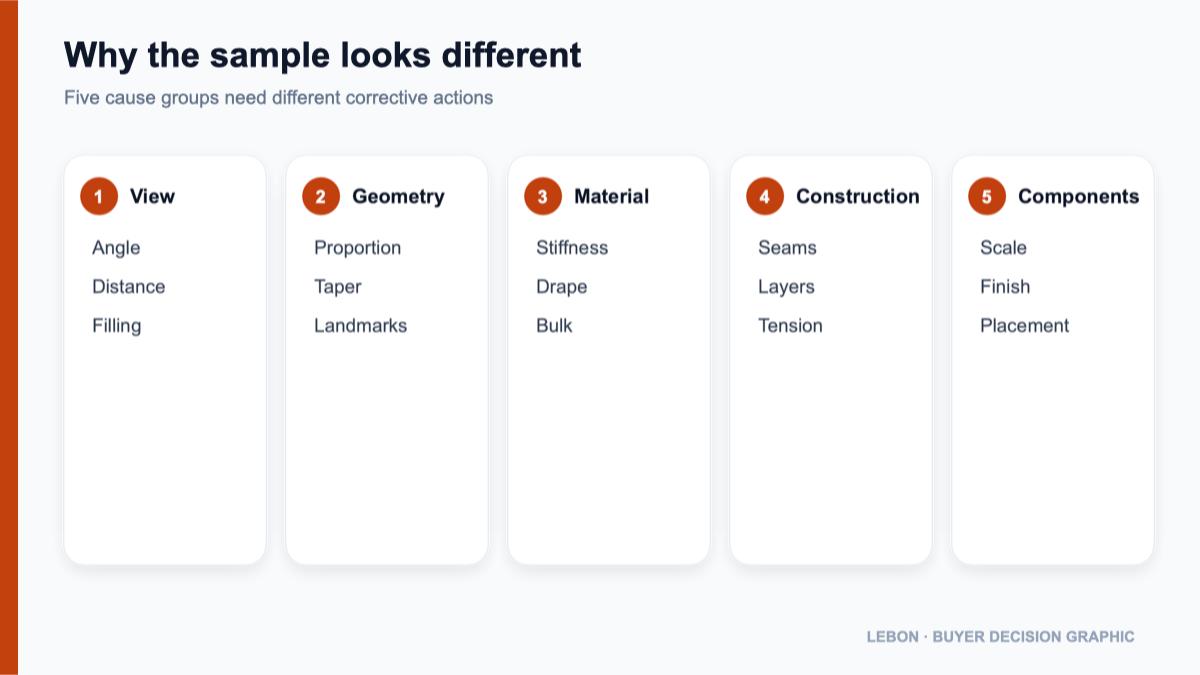
A bag sample can follow the supplied dimensions and still look different from a reference image. The image may show a filled or styled product, hide the side and base construction, distort proportion through camera angle, or use Materialien whose stiffness and surface behavior were never specified.
Do not begin with “make it look the same.” First compare the sample and reference in the same view and condition. Then separate the difference into geometry, material behavior, construction, component scale, finishing or photography. This turns a subjective visual complaint into a manufacturing decision and prevents the factory from changing the wrong feature.
Table of Contents
A reference image communicates appearance, not a complete product definition
A photograph can show silhouette, feature placement and general styling. It normally cannot prove:
- exact width, height and depth;
- the camera distance or lens effect;
- whether the bag is filled or internally supported;
- the shape and contents of any filling;
- fabric construction, backing or stiffness;
- foam, board or reinforcement layers;
- hidden gussets, darts, seam allowance or internal panels;
- zipper-chain construction and opening geometry;
- hardware dimensions and finish reference;
- how the bag behaves when empty or loaded.
If the buyer provides only the image, the factory must interpret those missing inputs. Two reasonable interpretations can produce visibly different samples.
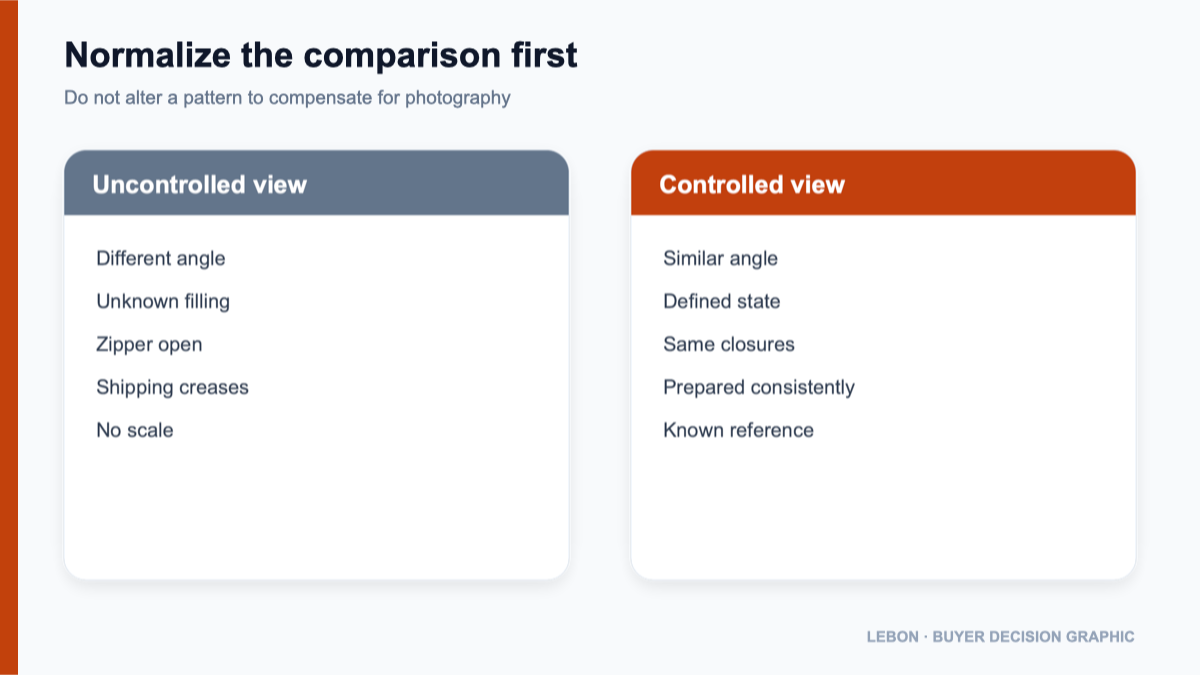
Compare the same view in the same condition
Before diagnosing construction, remove the comparison error:
- photograph the sample at a similar angle and height;
- use a neutral background and sufficient light;
- close or open all zippers and flaps in the same way;
- remove shipping compression where practical;
- compare empty with empty, or use a defined reference fill;
- align the product to the same orientation;
- include a known scale when proportion is disputed.
An image taken from above can make the base look deeper and the body shorter. A wide-angle phone view taken close to the product can exaggerate the nearest part. A reference bag filled with shaped inserts will look cleaner than an unfilled soft sample even when the pattern is similar.
The purpose of this normalization is not photography perfection. It is to stop the team from altering the pattern to compensate for a viewing difference.
Check finished dimensions and landmarks
If the normalized comparison still shows a proportion problem, check measurements using the current tech-pack method. Look beyond overall width and height:
- top width versus base width;
- body width at the feature location;
- gusset depth and base footprint;
- zipper opening length and curve;
- pocket size and position;
- handle drop and attachment spacing;
- logo size and distance from landmarks;
- relationship between hardware scale and panel size.
A sample can match the headline dimensions but differ in taper, curve or feature position. The guide on defining finished bag dimensions explains how to state the bag condition and measurement landmarks.
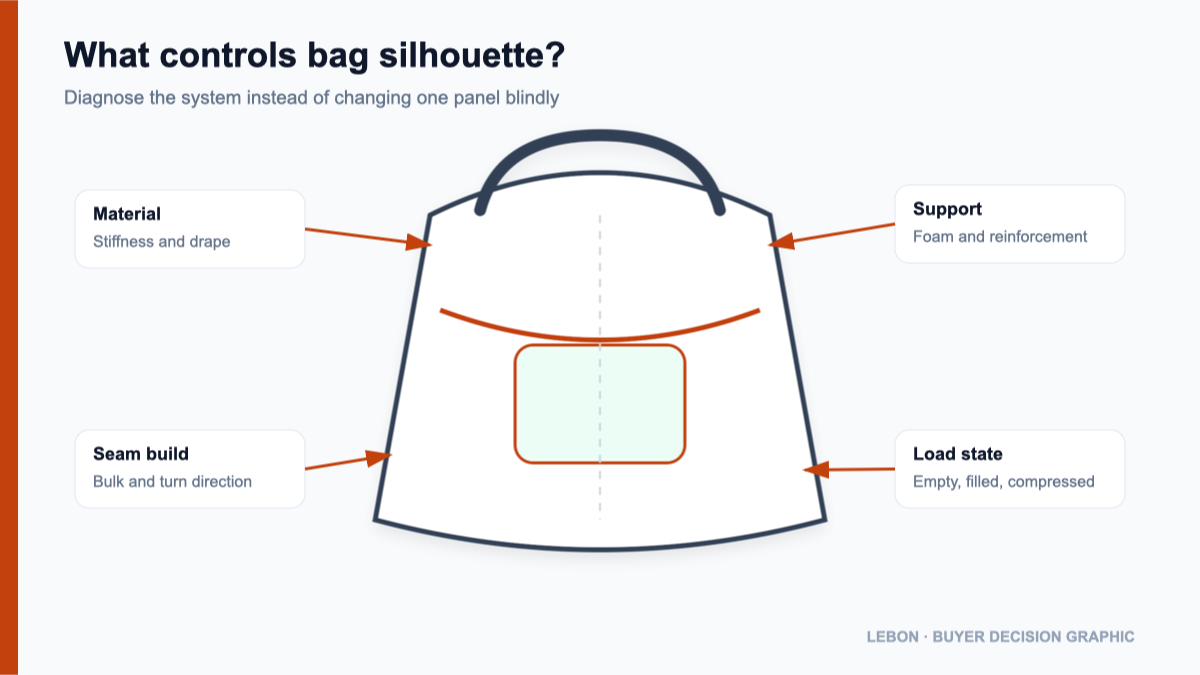
Material behavior controls silhouette
Changing material can change appearance without changing the pattern. Relevant variables can include stiffness, drape, thickness, backing, surface friction, foam recovery and the interaction between shell and lining.
A soft shell may collapse between reinforcement points. A firmer backing may make a panel stand flatter but also increase seam bulk. A thick lining or foam may reduce internal space and push curved seams outward. A coating can change how the panel folds around an opening.
The correct response is not always to choose the stiffest material. Structure should fit the intended product. A packable bag may need controlled softness. A presentation case may need cleaner standing shape. Review the trade-off with material swatches or controlled component trials rather than asking for “better fabric.”
See the custom bag Materialien guide for the specification questions hidden by broad material names.
Construction can change the visible line
Several manufacturing details influence the finished silhouette:
- seam position and turn direction;
- binding or piping bulk;
- the order in which panels are assembled;
- reinforcement size and edge position;
- zipper-tape installation and sewing tension;
- lining attachment and excess lining volume;
- darts, pleats and gusset folding;
- how foam is captured or compressed at seams.
For example, changing only the outer panel curve may not correct a top edge that is being pulled by the zipper and lining assembly. Adding more reinforcement may flatten one area while making the adjoining seam too bulky. The sample must be diagnosed as a system.
Component scale can make correct dimensions look wrong
Hardware, zippers, webbing and logo elements provide visual scale. A buckle that is wider than the reference can make the strap and front panel appear smaller. A thick zipper chain can make the opening look heavier. A logo positioned correctly by center point can still appear low if its artwork height differs.
Record component dimensions and finish, not only their generic names. For branded or nominated components, use an approved physical or supplier reference. For factory-proposed options, ask for comparison evidence before rebuilding the entire bag.
Finishing and sample preparation matter
A prototype can look uneven after packing, turning, folding or transport. Temporary creasing does not automatically mean the pattern is wrong. At the same time, repeated puckering, twisting or edge distortion can reveal a construction or material problem.
Before review, allow the sample to return to its intended condition and arrange straps, pockets and closures consistently. Do not steam, reshape or fill it in a way that hides a genuine defect. Record any preparation used so the comparison can be repeated.
Use a cause-based correction sequence
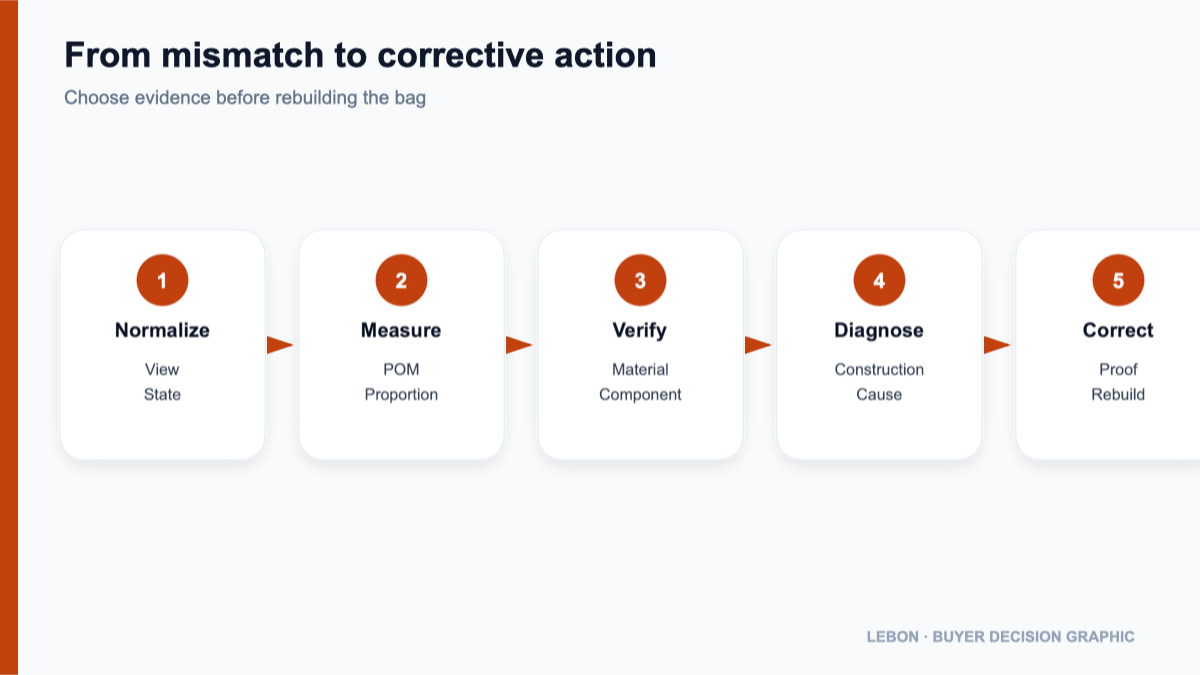
Work through the issue in this order:
- Normalize the comparison: view, state, filling and closure.
- Measure: check controlled dimensions and feature relationships.
- Verify Materialien and components: compare the sample with approved references.
- Inspect construction: identify which seam, layer or assembly is driving the shape.
- Choose the smallest effective correction: document change, component proof, partial mock-up or full rebuild.
- Update the specification: do not leave the approved correction only in a message.
When to revise the sample and when to revise the expectation
Rebuild or materially revise the sample when the mismatch affects product function, intended proportion, capacity, access, component compatibility or an approved visual requirement. A partial mock-up may be enough when the problem is isolated to an opening, pocket, handle attachment or construction detail.
Revise the expectation when the reference shows an unstated styling condition, an unavailable material behavior or a photographic effect that is not an appropriate production requirement. This is not accepting poor quality. It is separating the intended product from the way one photograph was staged.
There is no single correct response. The buyer should decide which visible attributes are essential, which can be achieved through specification changes and which belong only to presentation.
What buyers should send with the reference image
Provide:
- multiple views where available;
- known finished dimensions and measurement methods;
- intended contents and loading condition;
- material and component requirements;
- close-ups of critical construction;
- a list of attributes to copy, adapt or ignore;
- acceptable differences caused by new branding or function;
- the target market and use case;
- the latest sample feedback and approval status.
The article on why a bag drawing is not enough for production explains how to convert visual intent into controlled manufacturing inputs. Use the prototype versus pre-production sample guide to decide what the next sample is intended to prove.
Next action
If a bag sample looks wrong but the cause is unclear, send the reference views, current tech pack, sample photographs and measured differences through the product Anfrage form. The next step should be chosen after separating photography, specification and construction causes.
Technical references: